使用 Netlify 边缘函数生成动态 Open Graph 图片(翻译)
对 Generate dynamic Open Graph images using Netlify Edge Functions 一文的中文翻译,原作者是 Sean C Davis。
您刚刚发布了一篇博文,这篇博文有可能启发所有开发人员,于是您在 Twitter(无论它现在叫什么)上分享了这篇博文,但由于没有 Open Graph 图像,链接并不醒目。
用户直接继续滚动屏幕,而这个伟大的创意也随之消失。当网页被分享到社交平台时,网页预览图片可以为网页增色不少。但是,为每个页面生成图片可是一件很繁琐的工作!
让自动化来拯救您吧!
TL;DR
我们将深入探讨为网站页面自动生成 Open Graph 图像的方法。我们将探讨边缘函数(Edge Functions)如何为您按需生成这些图片,以及如何使用网站内容填充图片。本示例(以及其 Demo)演示了一个模板,您只需创建一次,即可将其应用于网站的所有页面。
带有图片的链接更易被点击
好吧,也许一张图片并不能决定一篇文章的成败。但它会使您的网页内容更加精致,增加更多点击量(至少 ChatGPT 是这么告诉我的)。
然而,添加图片又是一件繁琐的事情,会拖慢发布进程。
图片可以被动态生成
但如果不需要这么繁琐呢?如果网站上的每个页面都能自动生成图片,而您只需在发布前检查图片,那会怎样?
这是我们简化网站发布流程的一种方法。下面我将通过一个精简的示例向大家展示它是如何工作的。
如何使用边缘函数动态生成图片
Netlify 边缘函数功能强大,借助它您可以根据请求动态地生成内容,并从边缘(地理位置上靠近用户)提供适当的(动态)响应。
为了生成边缘函数的图像响应,我们将使用 Matt Kane 基于 @vercel/og(基于 satori)开发的项目 og_edge。它被设计为在 Deno 中运行,也就是边缘函数的运行时环境。
初始化项目
我们将专注于图像生成,以便更容易地将其应用到您的项目中。因此,我们不会使用框架,也不需要太多的先决知识。
从零开始
如果您想跟着一步一步做,可以从以下内容开始:
- 基础的安装了 http-server 的
package.json - 带有一个样板
index.html文件的public目录 - 在
package.json中设置一个名为dev的 script,内容为http-server --port 3000 ./public - 全局安装的 Netlify CLI
安装 VS Code Deno Recipes
如果您不习惯在 Deno 中工作,而是习惯在 VS Code 中工作,您可以使用 VS Code Recipes 将适当的设置添加到 VS Code 中。在终端运行以下命令:
netlify recipes vscode您还需要在 .vscode/settings.json 中添加 deno.path,并将其设置为 deno 运行时的本地路径。
最后,您的 .vscode/settings.json 应该包含五条 deno 属性:
{
"deno.enable": true,
"deno.enablePaths": ["netlify/edge-functions"],
"deno.unstable": true,
"deno.importMap": ".netlify/edge-functions-import-map.json",
"deno.path": "~/path/to/deno"
}启动开发服务器
我们可以使用 Netlify Dev 在本地测试边缘函数。在全局安装 Netlify CLI 后,运行此命令:
ntl dev --command "yarn dev" --target-port 3000这将打开一个新的浏览器窗口,显示 public/index.html 的内容。
请注意,yarn dev 和 3000 应设置为适合您项目的值。
构建一个基本的图像生成器
因为我们使用的是 Deno,所以无需安装任何依赖即可开始工作。不过,如果您更喜欢使用 TypeScript(我们在这些示例中展示的就是 TypeScript),您就需要安装 typescript 并添加一个 tsconfig.json 文件。
配置好后,您可以向 netlify/edge-functions/image-preview.tsx 添加一个边缘函数了!
import type { Config, Context } from "@netlify/edge-functions";
import { ImageResponse } from "https://deno.land/x/og_edge/mod.ts";
import React from "https://esm.sh/react@18.2.0";
const STYLES = {
wrapper: {
width: "100%",
height: "100%",
display: "flex",
flexDirection: "column",
backgroundColor: "#ffffff",
},
};
export default async (request: Request, context: Context) => {
const page = {
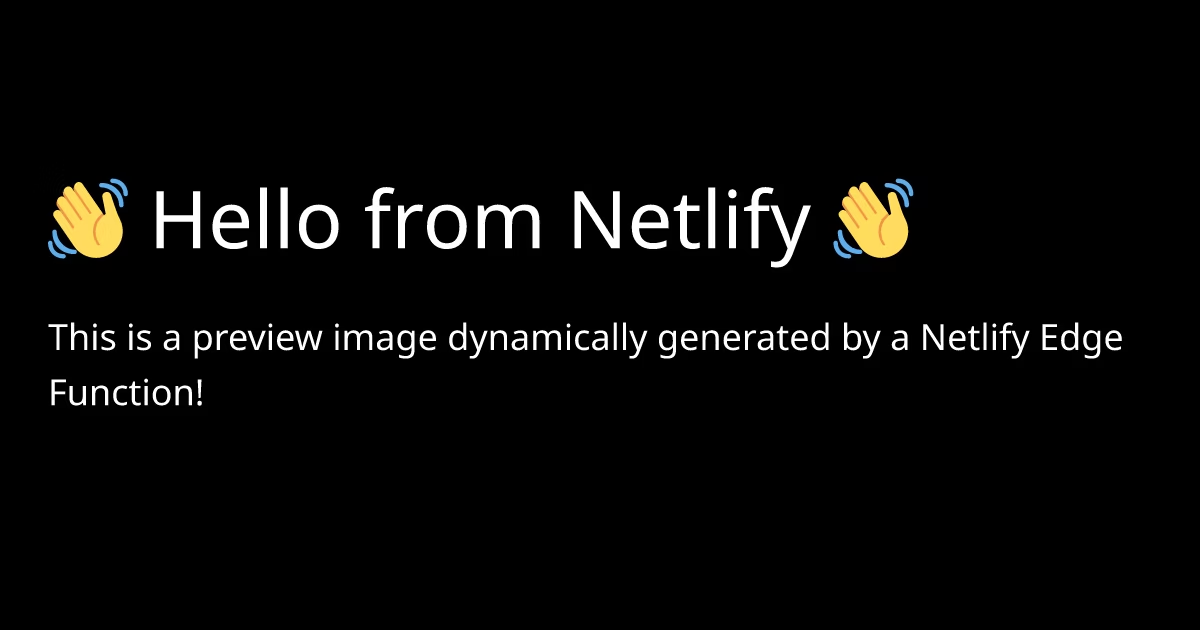
title: "👋 Hello from Netlify 👋",
description:
"This is a preview image dynamically generated by a Netlify Edge Function!",
};
return new ImageResponse(
(
<div style={STYLES.wrapper}>
<div>{page.title}</div>
<div>{page.description}</div>
</div>
),
{ width: 1200, height: 630 }
);
};
export const config: Config = { path: "/preview-image" };这个过程非常简单:
STYLES为我们提供了一套有组织的样式规则,可随时扩展用于标题和描述。page数据(暂时)是硬编码的。- 在访问
/preview-image时,我们使用og_edge的ImageResponse返回图像响应,该响应由config指定。
其结果并不美观,但它奏效了!

为图像添加样式
让我们一步步美化生成的图像。
为标题和描述添加样式
首先,让我们在 STYLES 中添加新规则,并使用 style 属性为内容添加一些 CSS。
// imports ...
const STYLES = {
wrapper: {
// ...
},
title: {
padding: "0 48px",
marginTop: "164px",
fontSize: 80,
fontWeight: 700,
},
description: {
padding: "0 48px",
marginTop: "36px",
lineHeight: 1.35,
fontSize: 36,
fontWeight: 300,
},
};
export default async (request: Request, context: Context) => {
// page data ...
return new ImageResponse(
(
<div style={STYLES.wrapper}>
<div style={STYLES.title}>{page.title}</div>
<div style={STYLES.description}>{page.description}</div>
</div>
),
{ width: 1200, height: 630 }
);
};
// config ...现在我们有了比刚才多一点点的样式:

添加 SVG 背景以及 Logo 图像
我喜欢使用 SVG 图像来美化这些图像。这样我就可以在 Figma 等设计程序中完成工作,然后将其作为组件放入项目中。
让我们从背景图片开始。您可以随意使用任何图片。或者从示例中借用。在示例项目中,我在 netlify/edge-functions/assets/BackgroundImage.tsx 添加了一个背景图片组件文件:
// netlify/edge-functions/assets/BackgroundImage.tsx
import React from "https://esm.sh/react@18.2.0";
export const BackgroundImage: React.FC = () => (
// SVG code goes here, with JSX syntax ...
)我还在 netlify/edge-functions/assets/Logo.tsx 添加了一个 Logo 文件:
// netlify/edge-functions/assets/Logo.tsx
import React from "https://esm.sh/react@18.2.0";
export const Logo: React.FC = () => (
// SVG code goes here, with JSX syntax ...
)然后,我们就可以将它们导入到函数中,并将它们用作 JSX 组件:
import { Logo } from "./assets/Logo.tsx";
import { BackgroundImage } from "./assets/BackgroundImage.tsx";
// other imports ...
// STYLES ...
export default async (request: Request, context: Context) => {
// page data ...
return new ImageResponse(
(
<div style={STYLES.wrapper}>
<BackgroundImage />
<Logo />
<div style={STYLES.title}>{page.title}</div>
<div style={STYLES.description}>{page.description}</div>
</div>
),
{ width: 1200, height: 630 }
);
};
// config ...现在,它们协调起来了!

为图像添加字体
使用自定义字体是一个棘手的过程。我建议您完全按照示例来操作,直到您掌握了窍门。(本指南末尾列出了一些窍门)。
首先,将字体添加到 public 目录(我把它们放在 public/fonts 目录中)。这里是字体示例。
我们将分四步把字体添加到函数中:
- 定义字体属性
- 在样式中添加 Font Family
- 使用函数加载字体数据
- 在边缘函数的图片响应中添加字体数据
// imports ...
// NEW: font attributes
const FONTS = [
{
name: "Pacaembu",
weight: 700,
style: "normal",
filePath: "pacaembu/PacaembuNetlify-Bold.woff",
},
{
name: "Pacaembu",
weight: 300,
style: "normal",
filePath: "pacaembu/PacaembuNetlify-Medium.woff",
},
];
const STYLES = {
wrapper: {
// NEW: Specify font family
fontFamily: "Pacaembu",
// other wrapper styles ...
},
// others styles ...
};
// NEW: Function to load font data
async function loadFonts(origin: string) {
return await Promise.all(
FONTS.map(async (font) => {
const { name, weight, style, filePath } = font;
const url = [origin, "fonts", filePath].join("/");
const fontFileResponse = await fetch(url);
const data = await fontFileResponse.arrayBuffer();
return { name, weight, style, data };
})
);
}
export default async (request: Request, context: Context) => {
// page data ...
// NEW: call the font loader to get the font data at runtime
const { origin } = new URL(request.url);
const fonts = await loadFonts(origin);
return new ImageResponse(
(
<div style={STYLES.wrapper}>
<BackgroundImage />
<Logo />
<div style={STYLES.title}>{page.title}</div>
<div style={STYLES.description}>{page.description}</div>
</div>
),
// NEW: include font data
{ width: 1200, height: 630, fonts }
);
};
// config ...刷新。如果一切配置正确的话,您就可以在您的图片上看到新的字体了!

使用动态内容
现在我们已经有了基础,并添加了一些样式。剩下的工作就是使页面内容动态化,这样我们就可以在网站的每个页面(或某些可预测的页面集)上使用此功能。
获取站点地图(Sitemap)数据
有几种方法可以获取渲染功能所需的内容。我尝试过几种不同的方法,但发现最可靠、最有效的方法是将网站地图内容缓存到一个 JSON 文件中,然后静态提供。
随着网站规模的扩大,您的选择可能会有所不同,但在撰写本文时,我们使用的是 15 KB 的数据缓存(未进行缩减),可以完成工作。
您可以尝试使用更适合您项目的方法。不过,请谨慎对待每次图像请求都调用外部 API 端点的做法,这可能会使您面临触及 API 限制的风险,具体取决于您使用的服务和网站上的内容数量。
Mock 站点地图的内容
在本例中,我添加了 20 个页面的 Mock 数据集。(谢谢,ChatGPT!)每个页面都有 title、description 和 slug 属性。我们将在函数中使用它们。
将站点地图数据放到 public 中 —— public/sitemap-data.json:
[
{
"title": "Edge Handlers Revolution",
"description": "Explore the impact of Edge Handlers in serverless.",
"slug": "edge-handlers-revolution"
},
{
"title": "Guide to Netlify Dev",
"description": "Explore Netlify Dev, a local dev tool.",
"slug": "guide-to-netlify-dev"
}
// more pages ...
]加载站点地图的内容
为了加载动态内容,我们将用一个获取网站地图数据的调用来替换静态 page 对象,并设置当网站地图中不存在 slug 时返回 404,然后将边缘函数的路由调整为动态路由:
// imports ...
// fonts and styles ...
// NEW: function to fetch sitemap and find the page data
async function getPageFromSitemap(slug: string, origin: string) {
const sitemapDataResponse = await fetch(origin + "/sitemap-data.json");
const sitemapData = await sitemapDataResponse.json();
return sitemapData.find((entry: any) => entry.slug === slug);
}
export default async (request: Request, context: Context) => {
// NEW: get the slug from the request params (reference `config` below)
const { origin } = new URL(request.url);
const { slug } = context.params;
// NEW: use the slug to call the function that fetches the page data
const page = await getPageFromSitemap(slug, origin);
// NEW: return 404 if the page wasn't found in the sitemap
if (!page) return new Response("Not found", { status: 404 });
// render image and return ...
};
// NEW: add dynamic route parameter `slug`
export const config: Config = { path: "/preview-image/:slug" };更新后,在生成图片时,您需要在 URL 中添加一个 slug 值。例如 /preview-image/guide-to-netlify-dev。
然后您就能看到动态生成的内容了!

注意错误的 slug(例如 /preview-image/__WRONG__)将返回 404。
构建该系统的剩余部分
到目前为止,我们只是刚刚起步。为了部署于生产环境,您还需要完成一些任务。
将元标签添加到布局中
您需要确保在相应页面或布局的 <head> 中呈现适当的元标签。不同的框架会有不同的做法,但最后得到的 HTML 应该类似于:
<meta
property="og:image"
content="https://developers.netlify.com/preview-image/guides/..."
/>可以改进的地方
以下是其他一些改进措施:
- 对内容的字符进行限制,使其不会超出图像的范围
- 根据内容长度动态调整字体大小
- 标题和描述的可选重置,以便图像内容与元值不同
- 为不同类型的页面提供不同的布局 / 背景
限制和窍门
值得注意的是这种方法的一些局限性和缺陷。我一路上遇到了几个障碍,希望您能避免。
satori 极度限制样式
用于生成这些响应的引擎 非常出色!但它也有局限性,而且很难调试,因为它不会在您做错事情时告诉您。
通过反复试验,我可以告诉您以下几点:
- 通读支持的 CSS 规则并熟知它们。例如,对于
display您只能使用flex。 - 不是所有的字体文件类型都是受支持的。
- 不支持可变字体,必须使用明确的字重。
- HTML 不能深度嵌套。
如有疑问,请参阅 satori 文档。我发现,当我得到一个不起眼的错误时,通常是由于 satori 限制造成的。
注意外部请求
我在上文顺便提到了这一点,但重要的是要注意这些边缘函数的外部请求。在使用这种方法时,您可能需要想出巧妙的缓存策略来避免外部服务的限制。
玩得愉快
最重要的是,我希望这能给您带来成果和乐趣。一旦我把它弄好了,看到这些图片在网站的每个页面上生动地呈现,感觉非常酷。在我们不断创作新内容的过程中,这种自动生成 OG 图像的方法将为我们节省大量时间。